Posts Tagged ‘Door Tag’
CA, Door Dec, Door Decs, Door Tag, knight, Midieval, Name Tag, prince, RA, ResLife, student affairs, Valparaiso University
In Door Decs on February 13, 2014 at 12:55 PM

Shield Door Dec
(Gabe)
Materials:
Instructions:
Cut the large shield out of colored paper and the smaller shields out of white paper. Glue them together and add your resident’s names!
Credit: Gabe, Valparaiso University

CA, crown, Door Dec, Door Decs, Door Tag, Door Tags, Name Tag, Princess, RA, ResLife, student affairs, Valparaiso University
In Door Decs on February 13, 2014 at 12:44 PM

Crown Door Dec
(Dia, Valparaiso University)
Materials:
- Colored paper (card stock, printer paper, or construction paper will all work)
- Glitter Glue
- Markers
- Scissors
- PTHB Simple Crown Template
Instructions:
Cut out the crowns from your colored paper, attach a simple color block for the name, and decorate with markers and glitter glue!
Hints & Variations:
- You can easily free hand the crown or choose a more complicated pattern.
Credit: Dia, Valparaiso University
Butterfly, CA, Door Dec, Door Decs, Door Tag, Door Tags, Name Tag, PA, RA, ResLife, Valparaiso, Valparaiso University, Valpo
In Door Decs on March 1, 2013 at 12:10 AM

Butterfly Door Dec
(Samantha Cassell)
Supplies:
Colored Paper
Hole Punch
Glue
Scissors
Markers
Butterfly Template
Instructions:
Each door dec has 4 parts: the colorful back, the two colorful wings, and the white body portion (see the attached template for shapes). Cut out each of the parts, hole punch a few holes into the wings to give it a pattern, and glue it all together!

So many colors!
Hints:
- Make sure when you cut out the wing portions, you flip the template over so you get one of each side. Theoretically they should be the same, but this makes up for small imperfections!
- Cutting takes a long time. Get comfy scissors.
Credit: Samantha Cassell, Valparaiso University
CA, Door Dec, Door Tag, Etch-A-Sketch, Name Tag, PA, RA, ResLife, Valparaiso University, Valpo
In Door Decs on August 28, 2012 at 12:16 PM

Etch-A-Sketch Door Dec
This door dec is great for a toy or childhood theme! Not terribly time consuming, but has a nice finished look.
Supplies:
Red & Tan Colored Paper
Fancy Tape/Ribbon
Buttons (Water bottle caps work well too)
Markers
Scissors
Tape or Glue/Hot Glue Gun
Instructions:
Cut out the large red shape and the front tan shape. Attach the tan block to the red block (I used a single picture square for each). Add colorful patterned tape or ribbon around the edges. Hot glue buttons or water bottle caps to the lower corners for the twist dials. Add a name, making sure it looks like it would on an Etch-A-Sketch, no disconnected lines, and hang!

So many almost-complete door decs!

Even more!
Hints:
- Attach the red and tan blocks together before adding tape/ribbon to make it easier. Tape works well since it doesn’t require extra gluing (can usually be found in a scrapbooking aisle).
- Use a small template to cut out tape/ribbon to make it easier and more uniform (see the attached scanned templates).
- Etch-A-Sketch Template (The large pieces are for the red background and the tan “screen,” the little strips are what I used for cutting out tape)
Credit: Samantha Cassell, Valparaiso University ResLife
Butterfly, CA, Cut Out, Door Dec, Door Tag, Name Tag, PA, RA, ResLife, Valparaiso University, Valpo
In Door Decs on July 15, 2012 at 11:09 AM

Butterfly Cut Out Door Dec
This door dec is a clever twist on the gluing cut outs onto paper. Can be done with any picture and match any theme!
Supplies:
Colored Paper
Glitter Glue
Markers
Scissors
Tape or Glue
Template of Shape (any shape can work!)
Instructions:
Cleanly cut out your shape from a square of paper. Tape/Glue a piece of contrasting paper behind the cut out hole. Line edge with glitter glue. Add name and hang!
Hints:
- Pick a simple shape that will be easily recognized without a ton of details.
- To create a super clean cut, gently fold the paper in half to make the first snip.
Source: Valparaiso University ResLife
CA, Door Dec, Door Tag, Flower, Name Tag, Origami, PA, RA, ResLife, Washington State
In Door Decs on July 12, 2012 at 5:38 PM

Kusudama Flower Door Dec
(Washington State University Resident Life)
Supplies:
Scrapbook Paper
Computer Paper
Puffy Paint
Glue
Kusudama Flower Tutorial
Directions:
I first painted papers with water colors, then made the flowers out of the colored paper. Glue flowers to cards and add names!
Hints:
- I would recommend cutting the petals before gluing them together that way they will be flat and will stay on the paper.
Source: Washington State University Resident Life
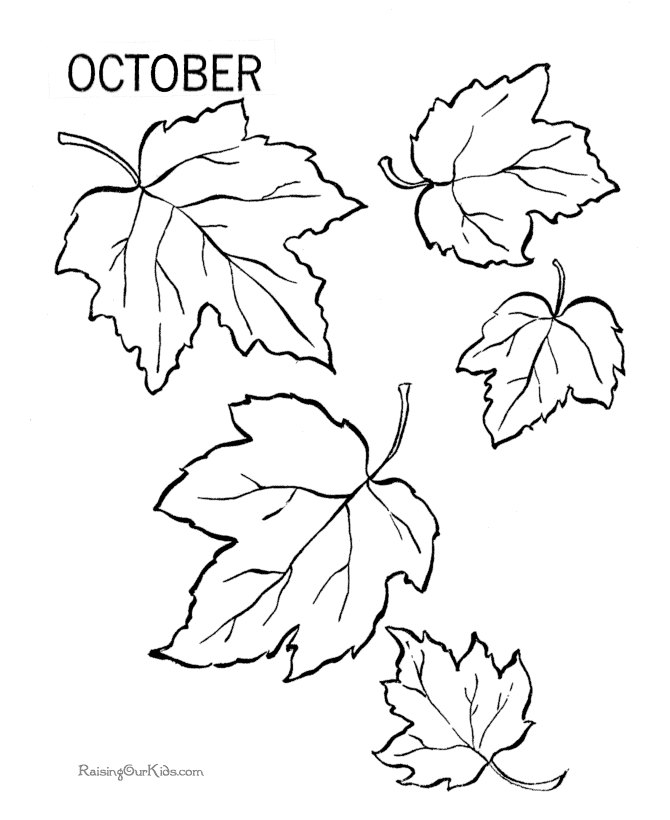
Autumn, CA, Door Dec, Door Tag, Fall, Leaves, Name Tag, PA, RA, ResLife, Tree
In Door Decs on July 10, 2012 at 10:10 PM

Fall Tree Door Dec
(Jazmyne Davis)
Supplies:
Colored Paper
Scissors
Glue
Markers
Tree Picture (unfortunately not the exact on pictured)
Leaves Picture
Directions:
Print tree picture and leaves picture on colored paper. Cut out, glue together, and write your residents name!
Hints:
- Consider adding fall decorations around the tree, maybe a pumpkin?
- Don’t feel like you need to cut out each leaf perfectly, “messy” leaves help give an autumn feeling.
Credit: Jazmyne Davis, Valparaiso University
CA, Door Decs, Door Tag, Frosty, Name Tag, PA, RA, ResLife, Shilo, Snow, Snowman, Valparaiso University, Winter
In Door Decs on July 10, 2012 at 9:19 PM

Snowman Door Dec
(Shilo, Valparaiso University)
Supplies:
Colored Paper
White Paper
Scissors
Markers
Glue
Circular cups or tubes in different sizes
Directions:
Use the cups to trace 3 differently sized circles onto the white paper. Cut out and glue into a snowman shape. Cut out mini hats and scarves, glues onto frosty. Decorate!
Hints:
- Use many different patterns and colors to brighten up your hallway!
- Consider making a snowwoman too!
Credit: Shilo, Valparaiso University
CA, Door Dec, Door Tag, Mitten, Name Tag, PA, RA, ResLife, Ribbon, Shilo, Valparaiso University
In Door Decs on July 10, 2012 at 8:20 PM

Mitten Door Dec
(Shilo, Valparaiso University)
Supplies:
Colored Paper
Scissors
Mitten Template
Ribbon
Directions:
Cut out mittens using the mitten template. Add names and decorate with ribbon!
Hints:
- Don’t feel limited to just ribbon or just stripe patterns, make crazy mittens!
- Connect roommates with a piece of string or yarn.
Credit: Shilo, Valparaiso University
CA, Door Dec, Door Tag, Ice Cream, Name Tag, PA, RA, ResLife
In Door Decs on July 10, 2012 at 7:36 PM

Ice Cream Door Dec
Supplies:
Colored Paper
Scissors
Glue
Ice Cream Template
Directions:
Cut out ice cream template. Trace and cut out scoops of ice cream and cones on colored paper. Glue together!
Hints:
- The example was cut out with a cricut, but the template design is VERY similar.
- If tracing the template, consider cutting out a cardboard version.
- If you are using computer paper, consider printing the ice cream scoops right onto your paper! Super easy to cut out!


